How to Dry Brine a Chicken: The Method
A quick and easy set of instructions to dry brine your chicken to encourage as much flavor as possible!
Ingredients
- 1/4 cup Dry Brine Mix
- 1 Small to Medium Chicken
- 1 Freezer Bag (gallon size usually fits a chicken)
Instructions
-
Mix your Brine. Get out a bowl, pour in your salt and add in the various herbs and spices you want to season your bird. Fresh cut herbs are always better. But you can use ground as well. Stir it all up with a fork until it’s evenly mixed.
-
Take your chicken out of the fridge. Wash it. Then pat it dry. You should dry it as much as possible. Keep in mind your adding salt, so any water on the surface will work to dissolve the salt before its pulled out the chicken juices first!
-
Once it’s dry, slip your finger under the skin of the chicken and separate the skin from the meat. Essentially you are creating pockets for your brine to rest directly against the meat. Open as many areas as you can: breast, legs, even thighs if you flip the chicken over.
-
Take finger-fulls of the bring and slip it inside the pockets between the skin and meat. Once you get a few teaspoons in, slip your finger in and spread the brine along the meat so it’s as evenly covered as possible. (This is the messy part.)
Make sure your chicken is on a cutting board or non-slip surface while you manipulate it. I’ve dropped a chicken that was on a slippery plate during this step. And while my cat was thrilled with that turn of events, I was not.
After all your pockets have been spread, rub the remaining brine on the surface skin of your chicken.
-
Wrap the chicken in plastic wrap or a plastic bag and remove as many air pockets as possible so the juices don’t evaporate. I like to set the chicken on a plate just so it's easier to flip around.
-
Let the Chicken Rest 24 Hours
Place your chicken in the fridge on a plate and let it sit for 24 hours. If you are brining for more than 24 hours, flip the chicken every 12 hours or so to allow gravity to pull the juice all through the meat.
If I’m brining for 3 days, I do the first 24 hours breast side up. The second 24 hours breast side down. And the third 24 hours breast side up with the plastic removed.
Removing the plastic on that last day helps the skin dry out in the fridge so it will be nice and crispy.
-
Preheat the oven to 400°F
Pull the chicken out at least 30 minutes before cooking to further dry a little before you cook.
Place the chicken on a roasting pan and place in the oven
Roast for about 40 minutes.
-
Turn the oven temperature down to 375°F
Roast for another 60 minutes.
-
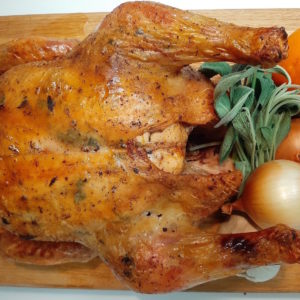
Remove the chicken from the oven
Let it rest 30 more minutes before carving! This allows it to cool enough to touch. But it also lets the juices settle back into the bird so they don’t end up all over your cutting board.