How to Dry Brine a Chicken
A complete guide to dry brines including a simple dry brine chicken recipe that creates a juicy flavorful chicken and crispy skin! Never suffer dry chicken again!
There is no more universal dinner than a roast chicken. Our ancestors have probably been making it since they discovered fire.
But this dry brine recipe also works for other birds like these Lemon Pepper Roast Cornish Game Hens!
It’s perfect for a casual weeknight dinner. And with a little attention you can dress it up for a weekend evening. Simple, quick, versatile, the universal dinner.
Another great bonus when roasting a whole chicken? The livers! Try this simple rustic homemade chicken liver paté for your next easy appetizer.
But chicken has its downsides.
It dries out easily. And anyone who has had a dried out chicken will agree: it’s pretty inedible. While are plenty of methods of cooking chicken that settle that argument…
Dry-bringing is the best one!
You don’t need dry-brining to cook an excellent chicken. But if you want to keep it from getting dry and fill it with flavor, or even just dress it up for a dinner party, Dry Brining is the way to go!
It’s a little extra work, but sooo worth it. The next time you want to impress, try out a simple dry brine chicken.
What Is Dry Brining?
Dry Brining is essentially a salt cure of your meat. How is it different from just sprinkling some salt on your chicken before throwing it in the oven? Simply, how long before cooking you salt it.
A dry brine usually goes on at least 24 hours but sometimes as many as 96 hours before you cook the chicken. The longer you do it, the more juicy and flavorful the meat will be at the end. Just rubbing some salt and spices on the chicken’s meat and skin a few days before cooking can make a huge difference. How exactly?
What Does Dry Brining do to my Chicken?
First, let’s think about what meat is. Most of what we eat are muscles. Muscles are made of small fibers bundled together. These fibers contract and expand, which is how animals are able to walk, breathe, pump blood and do just about everything else.
When exposed to heat, these muscles contract, squeezing moisture out. That’s why your chicken dries out when you cook it.
When salt is introduced to muscles, it breaks down many of these muscle proteins. This means the muscles will contract less when they are heated. As a result, you’ve retained the natural juices of the bird.
Of course, as the salt is doing this breaking down, it’s filtering through into your meat via osmosis. So now you’ve added flavor as well!
Why Dry Brine vs Regular Brine?
I’m sure some of you are asking how dry brining is any different or better than a regular brine.
A regular salt brine or “wet bring” is made from a salted water solution. Then your bird has to sit, entirely submerged, in this solution for at least 24 hours. All while being kept cold. I don’t know about you, but my fridge isn’t big enough for that.
And dealing with leaky bags of broth and chicken juices is a drag. Not to mention gross and absolutely horrifying if they break. Way to kill a weekend.
Even worse, the meat will lose flavor. The salt that breaks down the muscles is dragging water molecules with it. So your chicken gets nice and moist with a bit of salt and a lot of boring water. This actually dilutes the flavor of your chicken in the end.
In a dry brine, you rub the meat itself with salt, no water necessary. Not only is this so much easier to handle and store, but it actually flavors your bird differently. Why? When salt first comes in contact with the meat, it causes the muscles to contract and release moisture. But once on the surface, the chicken’s juices dissolve the salt. The salt slowly breaks down the muscles and the juices seep back inside. So your bird is retaining its own moisture and flavor as well as some added salt. Win-win!
And depending how you flavor your brine, you can always use leftovers in something like this Apple & Walnut Chicken Salad for All Seasons!
Reasons you should choose a Dry Brine:
- Same level of moisture
- The chicken will have more flavor
- Retains the natural juices and flavors of the chicken
- Easier prep
- Easier storage during brining
Sound good? Good. Let’s get started!
What Ingredients are in a Dry Brine?

First and most importantly, salt. Salt is the base for any dry brine. Sodium and Chloride, the two molecules in salt, are major factors in our cellular activities, and their chemical properties are the ones we need to exploit.
Without salt, you’re basically just rubbing your chicken with spices and letting it sit in the fridge. The flavors won’t go anywhere. The moisture of the chicken won’t be retained.
That said, you can add spices to your salt when mixing a brine. These extra flavors will be too big to be pulled into the meat itself. But they will flavor the skin and the very edges of the meat, which makes it worth it!
A quick and easy set of instructions to dry brine your chicken to encourage as much flavor as possible!
- 1/4 cup Dry Brine Mix
- 1 Small to Medium Chicken
- 1 Freezer Bag (gallon size usually fits a chicken)
-
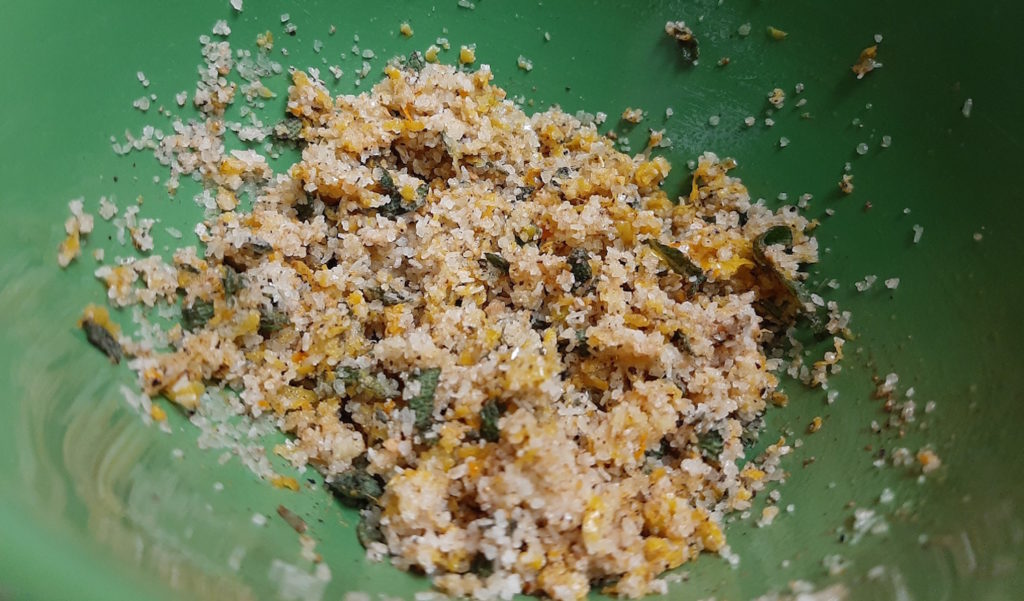
Mix your Brine. Get out a bowl, pour in your salt and add in the various herbs and spices you want to season your bird. Fresh cut herbs are always better. But you can use ground as well. Stir it all up with a fork until it’s evenly mixed.
-
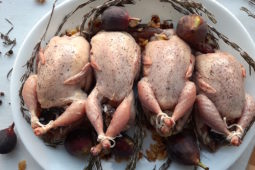
Take your chicken out of the fridge. Wash it. Then pat it dry. You should dry it as much as possible. Keep in mind your adding salt, so any water on the surface will work to dissolve the salt before its pulled out the chicken juices first!
-
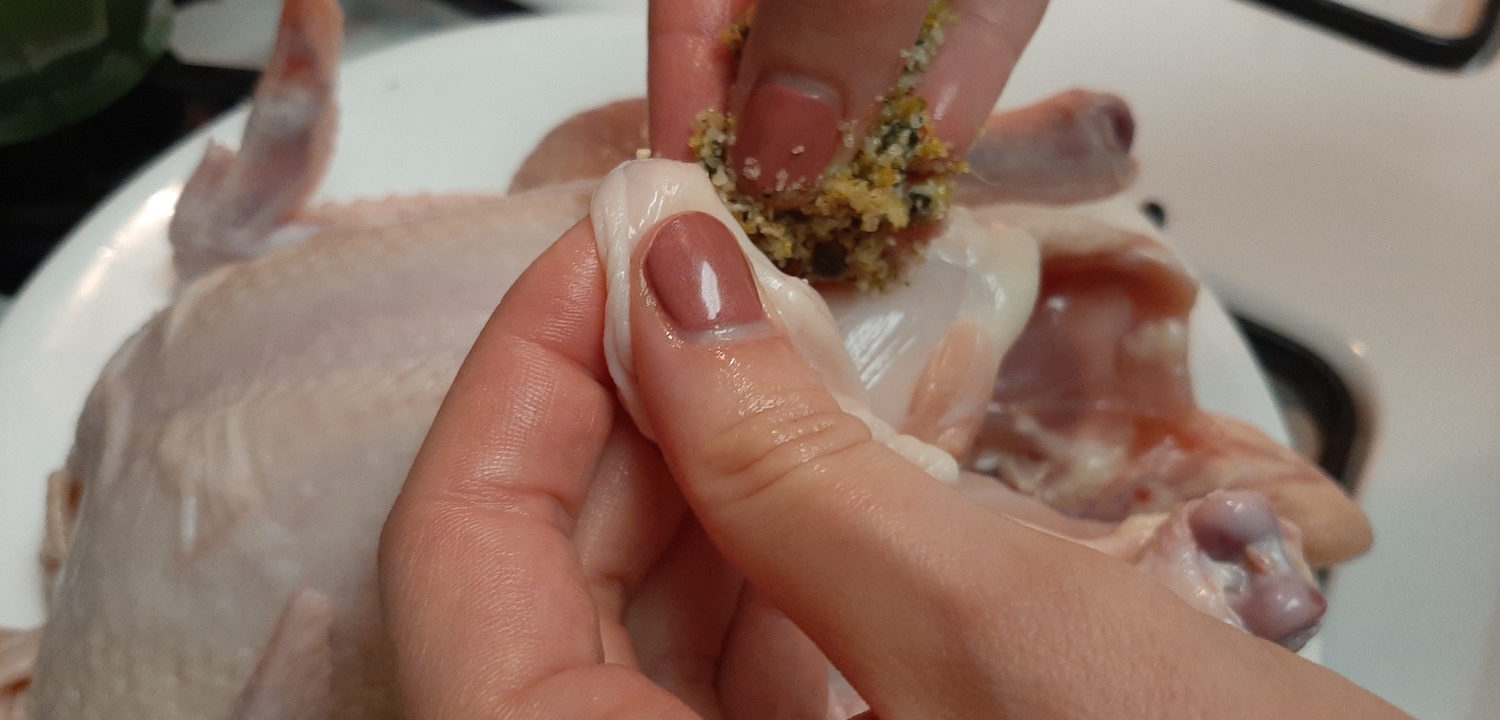
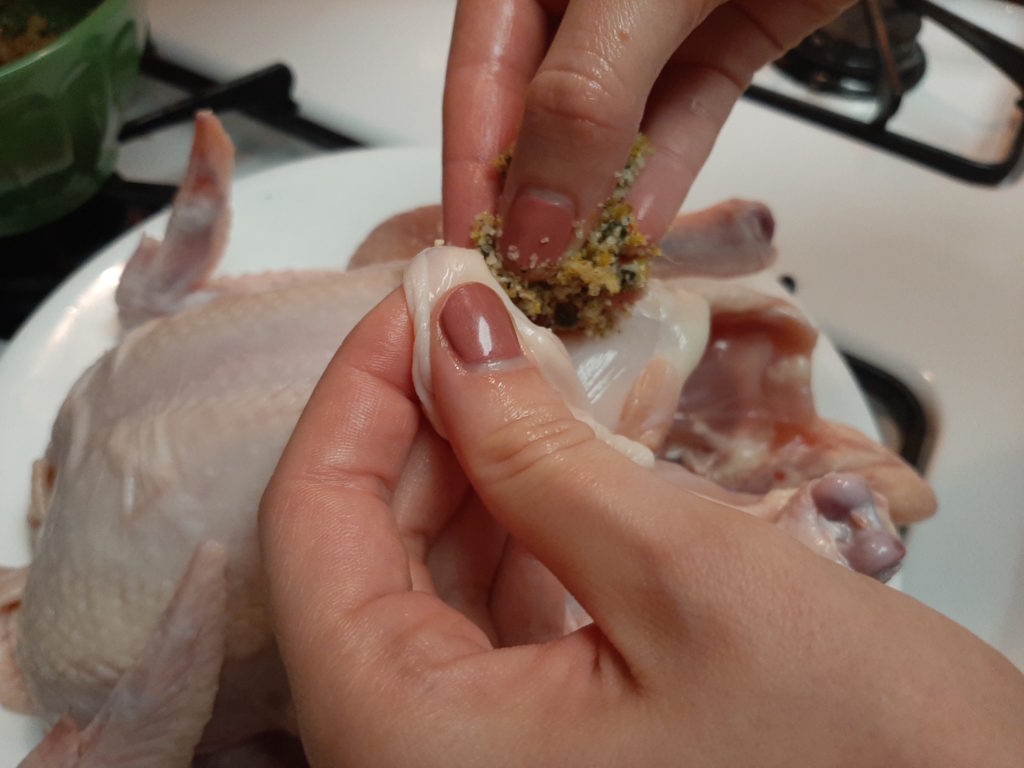
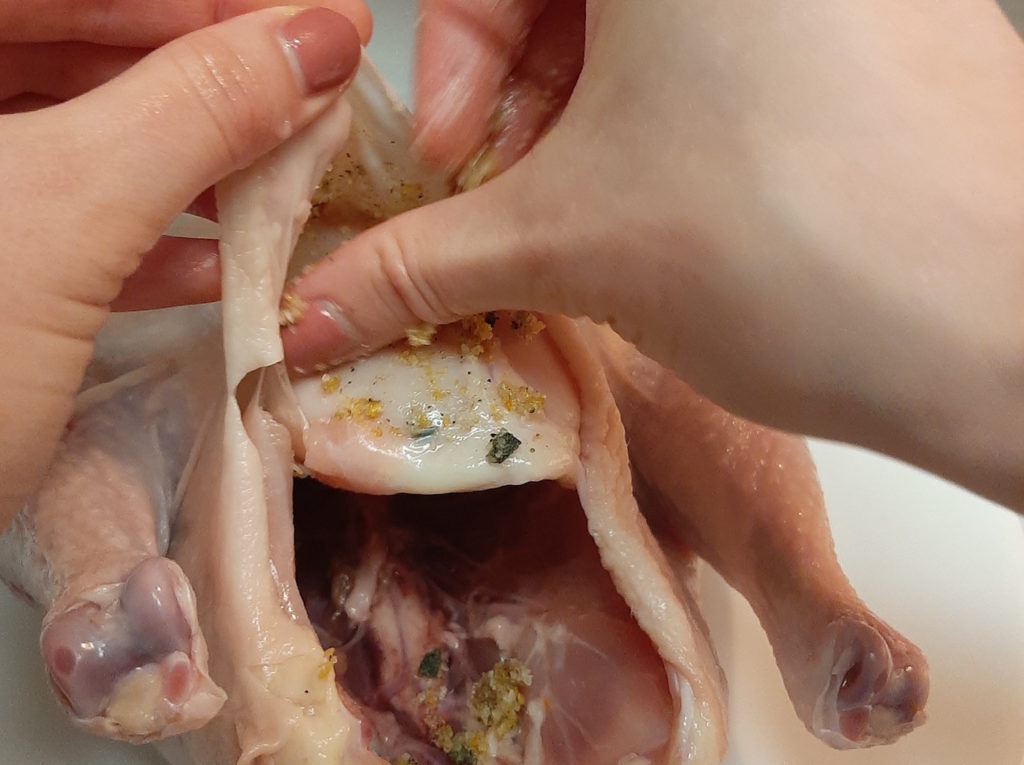
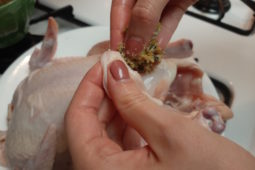
Once it’s dry, slip your finger under the skin of the chicken and separate the skin from the meat. Essentially you are creating pockets for your brine to rest directly against the meat. Open as many areas as you can: breast, legs, even thighs if you flip the chicken over.
-
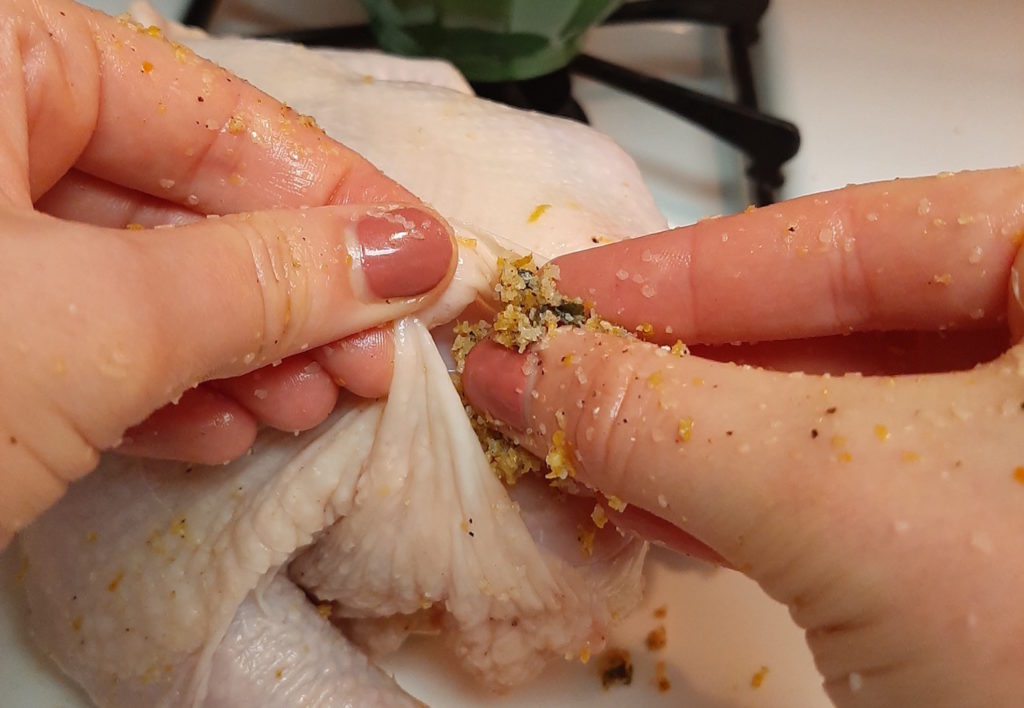
Take finger-fulls of the bring and slip it inside the pockets between the skin and meat. Once you get a few teaspoons in, slip your finger in and spread the brine along the meat so it’s as evenly covered as possible. (This is the messy part.)
Make sure your chicken is on a cutting board or non-slip surface while you manipulate it. I’ve dropped a chicken that was on a slippery plate during this step. And while my cat was thrilled with that turn of events, I was not.
After all your pockets have been spread, rub the remaining brine on the surface skin of your chicken.
-
Wrap the chicken in plastic wrap or a plastic bag and remove as many air pockets as possible so the juices don’t evaporate. I like to set the chicken on a plate just so it's easier to flip around.
-
Let the Chicken Rest 24 Hours
Place your chicken in the fridge on a plate and let it sit for 24 hours. If you are brining for more than 24 hours, flip the chicken every 12 hours or so to allow gravity to pull the juice all through the meat.
If I’m brining for 3 days, I do the first 24 hours breast side up. The second 24 hours breast side down. And the third 24 hours breast side up with the plastic removed.
Removing the plastic on that last day helps the skin dry out in the fridge so it will be nice and crispy.
-
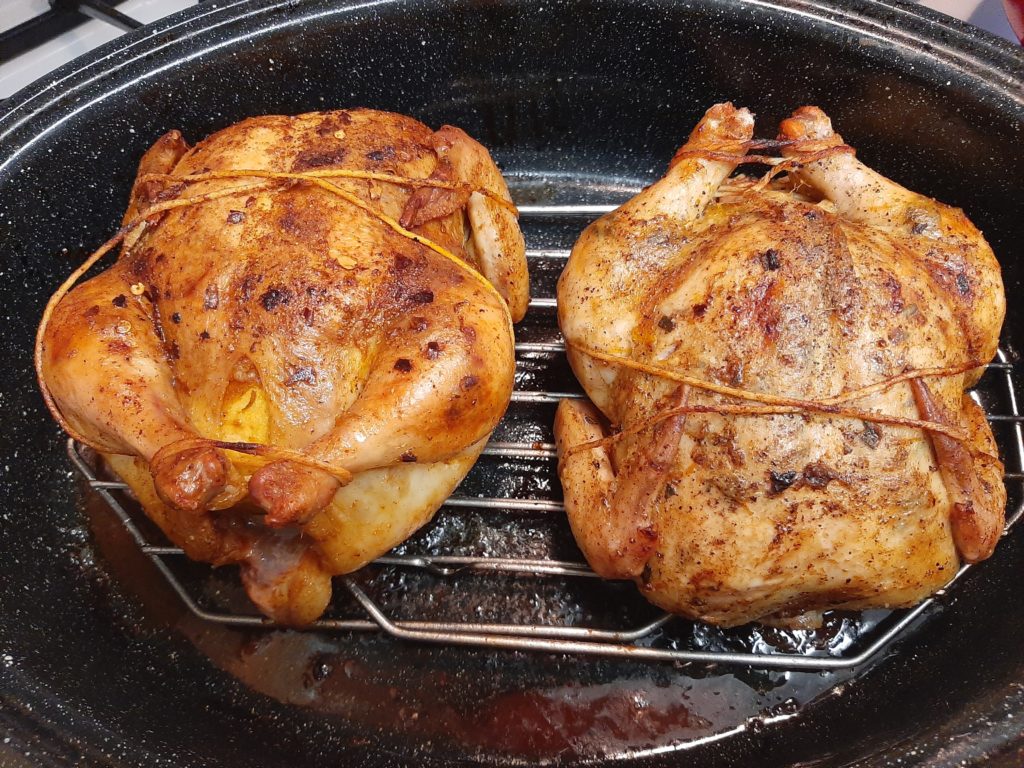
Preheat the oven to 400°F
Pull the chicken out at least 30 minutes before cooking to further dry a little before you cook.
Place the chicken on a roasting pan and place in the oven
Roast for about 40 minutes.
-
Turn the oven temperature down to 375°F
Roast for another 60 minutes.
-
Remove the chicken from the oven
Let it rest 30 more minutes before carving! This allows it to cool enough to touch. But it also lets the juices settle back into the bird so they don’t end up all over your cutting board.
Dry Brining FAQ:
Is it Safe to Dry Brine a Chicken for so long?
Absolutely. As long as it is kept chilled during the whole process. Remember, you’re not just eating the raw brined chicken out of the fridge. (If you are, this isn’t the post for you.) You are cooking the meat to a safe temperature, so most bacteria will be killed off. In reality, all you’re doing is keeping a chicken in the fridge for 3 days before you cook it. Honestly, who doesn’t do that during the week?
What’s more, the added salt will help keep away some bacteria, since salt can have a drying effect on their cells as well.
Should you baste a dry-brine chicken?
If you’re trying to make a super moist chicken, basting is not the way to do it. It will have absolutely no effect on the meat of the chicken at all.
But it will affect your skin! In some good ways, others less good.
The best theories behind basting are flavor and color. If you’re basting the chicken in its own juices from the bottom of the pan, you’re basically adding back all that fat and any seasonings that have dripped away during cooking. All those flavors will come surging back into the skin each time you add them to your chicken.
Basting increases the browning factor as all that fat you add back gets brown with heat. However, because your baste won’t necessarily be perfectly even, neither will the browning. If you’re using a basting brush, prepare for a streaked look. If you’re using a basting tube, you’ll get a more splotchy look. But it will be brown and it will definitely taste good.
Butter on a dry-brined bird?
I’m not going to lie, butter is one of the best things in the world. It tastes so amazing and livens up everything from pie crust to steaks. And yes, it tastes amazing on chicken.
But there is something of a debate about whether or not you should use butter on the skin of your dry brined chicken before you cook it.
You’ve taken all the time to dry brine and dry out your chicken’s skin to make it crispy in its final transformation. Dumping liquid on the dried out skin seems counter intuitive. Really, it’s the same argument as basting. Butter, once in the oven will act like a baste, but one made with even more water. (Butter is about 20% water.) Yes, it adds flavor. But it also keeps the skin moist. That same skin you worked so carefully to dry.
But I’m with you, I love butter.
So here’s a solution. After you take the chicken out of the fridge but before you truss it, slice some small pats of butter and slip them under the skin and inside the cavity, like you did with the brine mixture a few days ago.
(Don’t do this at the same time as the brine. Chicken can have bacteria and you don’t want raw butter sitting next to raw chicken for too long in the fridge.)
That way you’ll get the buttery flavor in the meat without dumping it all over your drying skin.
If you really want skin covered in butter, you can always melt a little in a pan and pour it over your skin after you turn the temperature down. But don’t open the oven door too much after that. You want the skin to dry out and brown, especially post-butter. Just be prepared for a splotchy look.
Crisping will be uneven on a butter-covered chicken. Butter also has milk fats in it which tend to brown on their own. You will end up with some areas looking darker than others. (But you’ll have that buttery taste so, I mean, it’s probably worth it if you’re not going for presentation.)
Troubleshooting Your Dry Brine.
No matter how well planned, there will always be a few unanticipated things that come up. There are a few common questions and problems that arise in every dry-briner’s life. I have personally panicked about each and every one of these, so I know the feeling. But I can assure you, all is not lost!
You added too much salt.
How much is too much? You take it out of the fridge to cook and there are still huge salt crystals sticking to your hands. It’s okay. Just brush them off the chicken and into the sink. The chances are the meat is probably going to be very juicy, which is a good thing. But extra salt on the skin can be too much. Brushing off* extra salt from the skin will keep it from tasting like the rim of a margarita glass. But remember, only do this if you really think it’s noticeably too salty. Most of the time, the amount you put will probably work out just fine.
*Brush, don’t wash! Washing defeats the purpose of drying out the skin for hours.
You forgot to flip the chicken while it rested.
This is also not a real crisis. Flipping uses gravity to help the brine soak in and the juices flow within the bird. But if you’re rubbed salt into the meat and skin, the brining process will happen no matter which direction your chicken rests. Salt knows what it’s doing.
My chicken looks pink! Is it under-cooked?
Actually, no. Your chicken is cured. Curing it what happens when salt moves through the muscles via osmosis. And one of the effects is a pink hue to your meat. I know, we’ve all been told if the chicken is white and the juices run clear, it’s done. But when you cure, those elements can change a little bit. The real test of doneness is a meat thermometer. A safely cooked chicken will be 165°F. And if you are worried it’s not done when you take it out, remember it cooks a little while longer in the pan.
It’s also good to note, younger chickens will likely be more pink. They retain more moisture and their bone marrow which contributes to the pink color.
Reheating a Dry Brined Chicken
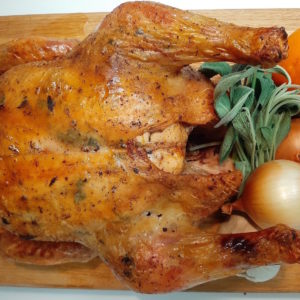
You’ve gone through all the trouble of creating a perfectly scrumptious, juicy on the inside, crisp on the outside chicken.
But you didn’t finish it. That’s okay. It’s probably better for you anyway.
(Or maybe you were specifically planning for leftovers. Nothing like cooking a chicken on Sunday and being able to snack on it all week. Can anyone say weeknight leftovers?)
But now that you’ve gone through all this trouble and avoided that dried husk of a bird you can barely swallow, you’re wondering how you can easily reheat your delicious bird without ruining all the hard work you put into it.
There is a way.
1. Be sure to store your chicken correctly.
The key step in reheating a chicken starts before you even finish your first meal. You want to make sure it doesn’t lose too much moisture. Store your chicken in an airtight container to avoid any air reaching the chicken to dry it out. It already has the disadvantage of being cooked, so the natural juices are more likely to escape.
If you have any pan drippings left, pour some over your chicken before you seal it away. Even a tiny bit more moisture can help.
2. Wrap in tinfoil before placing in the oven.
- Get out an oven safe dish and cover it with a large enough sheet of tin foil to fold back over the chicken.
- Place the chicken inside the tin foil.
- Add in a pat of butter (about ½ to 1 tbsp) depending on the amount of chicken you are reheating*
- Add in any other vegetables you want to serve.
- Close the tin foil tightly over the chicken. Leave a tiny hole for steam to escape.
I personally like to use ½ tbsp of butter per cut of meat I’m reheating. So if I’m just making a chicken leg, I use ½ tbsp. If I’m reheating half a chicken, I do around 1 tbsp to 1.5 tbsp. The butter mixes with the fat and escaping juices from the chicken and creates a lovely rich jus you can drizzle over as a finishing sauce!
I also love throwing in some sliced carrots, onions, mushrooms or other root veggies. They cook directly in the fat and chicken drippings and taste absolutely wonderful. Just make sure you cut them small enough that they’ll cook through during a reheat!
*If you’re hesitant to use butter, you can drizzle a little oil over the top. But you will want to add a tiny bit of broth to your tin foil sack. Part of the job of the butter is to add moisture to the reheat. Broth and oil will add in that moisture and some additional flavor as well.
3. Reverse your original cooking method.
- Place the chicken in a cold oven and allow to heat to 350°F.
- Cook the chicken for around 20 minutes
- Remove from the oven and open the tin foil.
- Raise the oven temperature to 400°F
- Place the chicken back in the oven, uncovered until the oven reaches 400°F.
- Let the chicken stay in the 400°F oven for 10 more minutes.
- Remove, let cool for 10 minutes
- Serve!
If you’re perfectly happy with your chicken after it’s heated up for 30 minutes, go ahead and consume.
I prefer to leave it in the 400°F oven uncovered and let some of that crispiness return to the skin. (It works, I promise!)
Since it’s in the high heat for such a short time you won’t dry out the chicken before the skin crisps. And if you add enough butter or broth, it’ll hardly notice the high heat effects on the meat at all!
Recommended Recipes:
Figuring out which dry brine spices go best together can be a bit of a challenge. Below are some recommendations of particular brines I enjoy and what seasons suit them best!
All of these recipes use 2 tablespoon kosher salt as a base. For an average sized chicken (8 pounds) that will be plenty. If you don’t want the salt, you can remove it as a base and just use the seasonings.
Just remember that salt makes the chicken juicier by soaking into the flesh slowly. And it draws the other spices with it. Without salt your chicken might come out drier and less flavorful. But if you’re careful with your cooking time, you should be fine!
Spring/Fall: Orange and Sage
- Zest of one orange (or 2 tangerines)
- 2 tsp freshly minced Sage leaves
- 1 tsp Ground Ginger
- ¼ tsp Cardamom
- Pepper to taste
Summer: Chili Lime
- Zest of 1 lime
- 2 tsp Smoked Paprika
- ½ tsp Cayenne Pepper
- ½ tsp Coriander seeds
- 1 tsp Crushed Red Pepper Flakes
Winter: Orange, Mushrooms, and Juniper
- Zest of 1 Orange (optional, but adds a Christmassy flavor)
- 3 dried ground Morel Mushrooms
- 1 tbsp fresh minced Thyme Leaves
- 2 tsp ground Juniper Berries
- 1 tsp of dried Mustard
What to serve with your chicken?
Roast Chicken is such an easy, simple meal. It can be prepared for any season and pairs with nearly any vegetable. Below are some of my favorite options!
- Sheet Pan Roast Vegetables
- Sliced Acorn Squash
- Sautéed Asparagus
- Creamed Spinach
- Savory Stuffed Apples – perfect Thanksgiving alternative
And try this delicious cardamom panna cotta for dessert! It only takes 10 minutes of cooking time. (Then you can watch Netflix while it rests and your chicken cooks. How great is that!)
What wine to pair with your chicken?
Most people automatically think chicken can only go with white wine. That’s definitely not the case. Chicken is one of those white meats that, when cooked well, can stand up to a light-medium red wine.
If you’re debating between options, think about what seasonings you added to your chicken and what else is coming along. Rich and thick gravy? You might want to pick a red. Light sautéed summer vegetable? A white wine is probably best.
Also consider the summer and what wines best fit the atmosphere!
Spring/Summer Pairing Suggestion
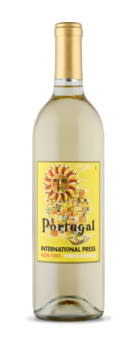
Vinho Branco: International Press NV Vinho Branco Portugal
“Vinho Branco” is just Portuguese for “white wine.” But Portugal’s white wines tend to be peppy, bright, and fizzy which is fairly distinctive.
Interestingly I found this wine through a venture into the Firstleaf Wine Club. It’s an absolutely perfect summer wine. Full of pear, jasmine, and lemon it’s bright and happy. The fizz is a little less than a typical Vinho Verde, which actually makes it quite nice to pair with foods…like chicken!
Pinot Noir: 2017 Bacchus “Ginger’s Cuvée” Pinot Noir $12.99
The key to pairing a red with chicken, especially during the summer is to keep it light. Bacchus has created an entirely unoaked Pinot Noir that is really exceptional for the price. It’s full of fresh fruit notes like cherries, pomegranates, and raspberries. Light, fresh, and delicious, it’s perfect for a summery roast chicken.
Fall/Winter Pairing Suggestion
Viognier
Viognier is basically Chardonnay for someone who hates Chardonnay. They are big, full-bodied whites from France. Usually full of fruity flavors like honeysuckle, guava, peach, and other tropical or white fruits. Viogniers are typically fairly textured, and while they rarely taste like butter, some have been aged and will have oak or vanilla notes.

Côtes du Rhône: 2018 Domaine De La Bastide Côtes du Rhône $21.99
Côtes du Rhônes are typically medium-bodied reds with great fruit character and lower tannins. The fruitier they are, the better the blend with chicken! But they are very warm and cozy in flavor generally, so they definitely go best in winter.
Domaine De La Bastide creates a lovely, fruity wine. Appearances are deceiving however, it does not taste like figs. It’s full of red fruity like cranberries and raspberries and currants!
Any tips or tricks I left out? Let me know in the comments if you’re a steadfast briner or prefer to go without!


What a great guide to Dry Brine a Chicken! Thanks for all your tips and wine paring suggestion! LOVE it!
Thank you, Irina!
Wow this is so insightful! Learned a few new tips and tricks from this, can’t wait to try it out!!
Thanks, Noelle! Let me know how it goes!
I’ve never heard of dry brine. This is great. I’ve learned so much from this.
Yay! That makes me so happy to hear you learned something new!
It’s great you are showing your audience how to brine, it can be great for so many different types of proteins including fish. The guide is nice and detailed also 🙂
Thank you! Yes, Brining seems to be the best-kept secret of cooking!
This post was SUPER informative!! I also appreciate the wine pairings!
Thanks! Always feel like we forget about the wine!
[…] you’re desperate to avoid a dry turkey, try dry brining to keep the bird moist, crisp, and flavorful. Otherwise, a deep-fried turkey will be much more tender and juicy than your average roast. Smoking […]
[…] How to Dry Brine a Chicken – Sugar and Spice (sugarwithspiceblog.com) […]