Crispy Roast Chicken
We’ve probably been roasting chickens over fires since the dawn of time. A perfectly roasted chicken is one of the most exquisite and delicious meals you can serve. It’s also one of the simplest and most classic. And you really should have the ability to make it in your arsenal. So then why does making a crispy roast chicken seem so darn complicated to get right?!
Got extra leftover chicken? Try it in these adorable mini individual chicken pot pies!
The same reason turkeys dry out and cornish game hens end up soggy. The heat in your oven is either too high or too low to both cook the interior to a juicy and crisp your crust simultaneously.
Looking for some not-soggy cornish game hens? Try these Lemon Pepper Roast Cornish Game Hens using another twist on this classic dry brine recipe!
A nice long slow cook will result in meat so tender it literally melts in your mouth and falls off the bone. But the skin won’t be crispy at all. A speedy flash cook will crisp your skin to delicious fatty goodness, but you’ll end up with raw meat.
Don’t forget to use the leftover livers from your chicken in this simple homemade rustic chicken liver paté! A perfect easy snack or appetizer before your chicken dinner!
There is a solution…and fortunately for you it doesn’t require too much work.
TLDR
- Brine your chicken.
- Heat your oven to 500
- Place your seasoned chicken breast-side down, cook for 15 minutes
- Flip chicken to breast-side up using gloves, cook 15 minutes
- Lower the oven to 375
- Cook the chicken for 30 to 40 more minutes depending on size.
- The end.
Now if you’re not worried too much about presentation or crispy skin, you can just pop your seasoned chicken in a 375 oven for 1.5 hours and call it a day. You’ll have a lovely tender roast chicken and an easy weeknight dinner. This requires even less work and definitely counts as a roast chicken in your arsenal. So by all means, try that first!
But if you feel you’ve graduated to the dinner-party-chicken level and you want to impress your guests. (Or your mom…Hi Mom!) Then you want something that serves as a show-stopper when you carry it out. Something worthy of displaying on your grandmother’s silver tray.
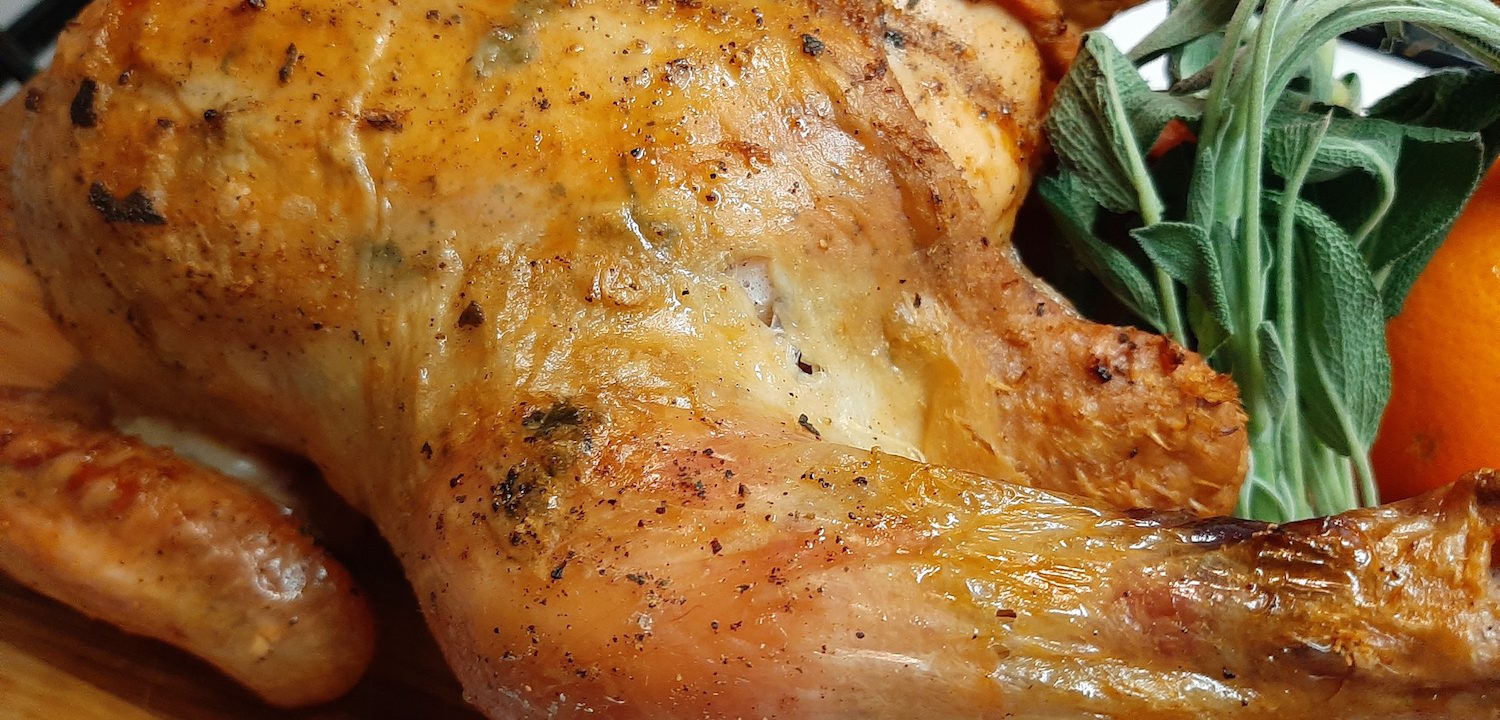
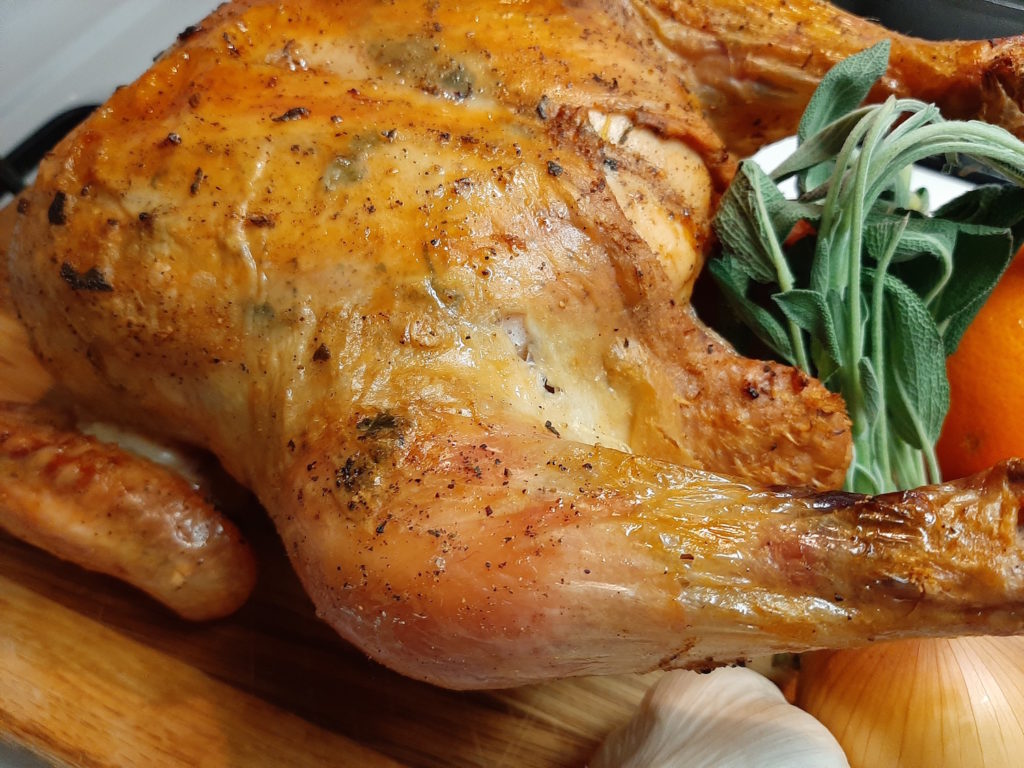
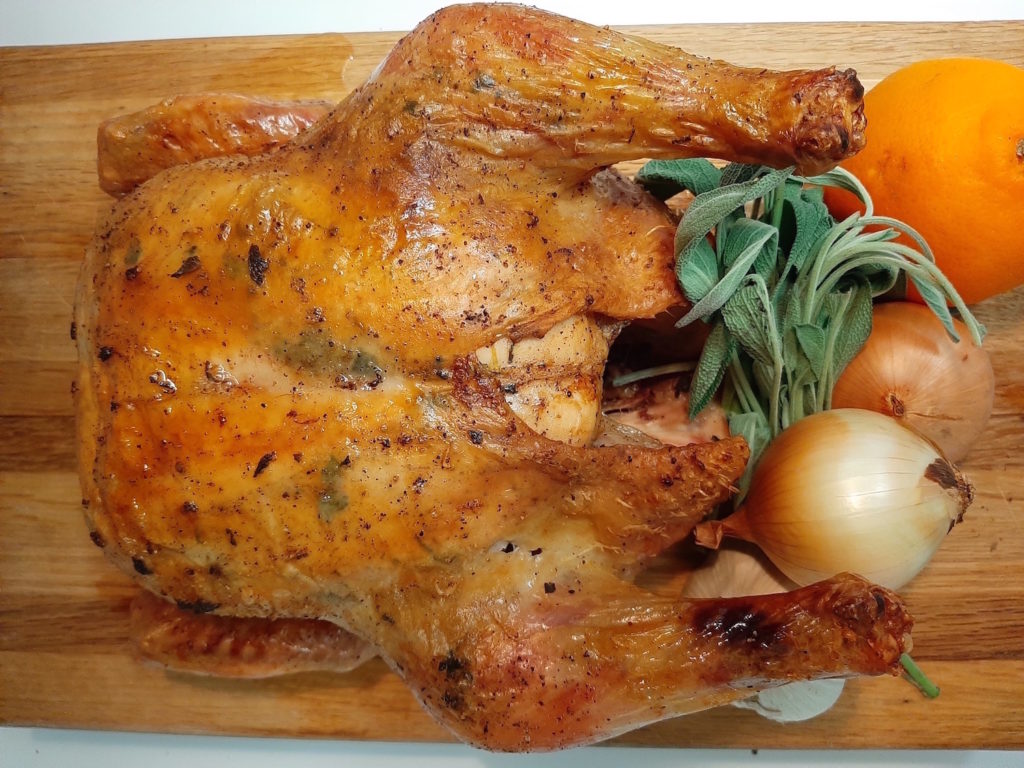
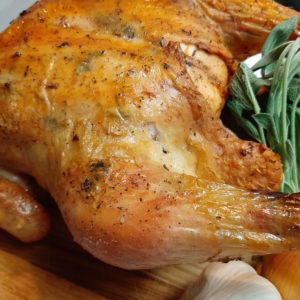
This means, you need a chicken that looks as good as it tastes. (And makes everyone ask you to leave the skin on, because secretly isn’t that what we all really care about anyway?) A gorgeous, exquisite chicken is what sets apart good cooks from I’m-getting-by ones. Be a good cook. Make a chicken that is succulently tender yet perfectly crisped. You’ll thank yourself.
A word about brining

For this recipe I seasoned my chicken using a dry-brine. This is not essential by any means. I tried brining once on a Thanksgiving Turkey and became addicted for life. There’s no hope for me. And if you want a no-fail seasoned and juicy chicken, you’ll start your addiction today too. If not, fine. Easy quick chicken dinner for you.
Brining is simply salt-curing your chicken. It’s done early to allow the salt time to draw out all the liquid and slowly dissolve back into the meat, breaking down tough proteins as it goes. The result is a very flavorful, moist, and tender chicken. The meat will be less tough and full of the chicken’s natural juices (and some salt.)
You can add seasonings to your salt base as well. But the majority of these seasonings are made of molecules that are too large to penetrate the chicken cells’ membranes. That isn’t a reason not to brine, just don’t be expecting the very depths of your chicken breast to taste like ginger. Instead, you’ll have a lovely seasoning on the very top of the chicken which tends to need the most help anyway. Oh, and a lovely seasoning on your skin. Let’s not forget that.
What I love about brining (aside from everything I just told you) is how easy it makes dinner prep the night of the meal. I just pick an evening when I have plenty of time, brine and season my chicken, pop it in a bag and stick it in the fridge. This means the day I cook I just pull out the chicken, put it in a roasting pan, and set it in the oven. All I have to do is chop the vegetables!
Note: Don’t dry brine longer than 4 days for safety’s sake. I usually keep my brines to 3 days in advance.
In this recipe I used my Orange, Sage, and Ginger Dry Brine. But there are many other options. And you can adjust the seasonings according to the season or what you may have in your spice rack. Feel free to experiment!
Why do I cook chicken breast-side down?
Cooking breast-side down (and brining breast-side down) allows the juices and fats from the cooking chicken to flow into the breast meat. Breast meat is typically the driest and least flavorful, so it needs all the help it can get. Use gravity on your side and let some of these heated juices and initially melted fats flow into that meat to flavor it.
What sides pair with Roast Chicken?
Roast chicken is such a quintessential dinner you can pair it with almost anything. I prefer to pair it with warm roasted dishes in the winter months. (Though this winter pear and kale salad with cranberry balsamic dressing makes a great fresh veggie pairing!)
But in the spring and summer try a light salad or cold pasta!
One of my personal favorites is a southern twist with this Southern Sautéed Okra! Other options are below:
- Roast Veggies or Roast Butternut Squash
- Three Bean Salad with Lemon Mustard Dressing
- Sautéed Green Beans with Garlicky Mushrooms
- Yogurt & Dill Green Beans
- Rustic Mushroom and Leek Galette
- (Appetizer) Creamy Crab-Stuffed Mushrooms
- Watermelon and Herb Salad (Two ways!)
- Low-Carb Eggplant & Tomato Pizzas
And if you have leftovers? Try them in this delicious Apple & Walnut Chicken Salad for All Seasons!
What wines pair with Roast Chicken?
Again, roast chicken really pairs with anything it’s so versatile. Instead, focus on which seasonings you used and what sides you’ll be adding. Pair with those as they are likely to be more flavor dependent. But, if you are looking for classic hits…
- Full-Bodied Whites like Chardonnay, Viognier, Pinot Gris, South African Chenin Blanc
- A funky Orange or Sauvenierres or even Dry Sherry
- Light Red like Beaujolais, Pinot Noir, Gamay, Grenache, or Côtes du Rhône
Tender Juicy Chicken with a Melt-in-Your-Mouth Crispy Skin!
- 1 Orange zested, then quartered
- 1 tbsp fresh Ginger grated
- 1 tbsp fresh Sage minced
- 2 tsp ground Black Pepper
- 2 tbsp Kosher Salt
- 1 stalk of Celery chopped in 4 (optional)
- 1 small Yellow Onion quartered (optional)
- 1 Carrot chopped in 4 (optional)
- 1 clove fresh Garlic (optional)
- Baker's twine (optional)
-
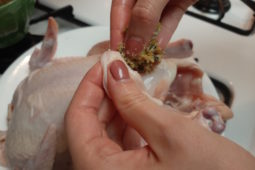
Create your seasoned brine. Add Orange zest, grated Ginger, minced Sage, Pepper, and Kosher Salt to a mixing bowl. Stir with a fork to combine.
-
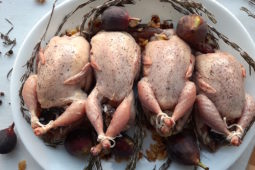
Brine and season chicken all over. Make sure brine goes between skin and flesh. Place fully covered in the fridge for 1 day, breast-side up. Flip the chicken breast-side down on day 2. On day 3 flip chicken breast-side up again. Uncover. Keep in fridge.
-
Remove brined chicken from fridge 1 hour to 30 minutes before cooking. Allow to rest on counter uncovered to dry and warm up.
-
Preheat oven to 500°F.
-
(Optional) Stuff chicken cavity with the orange quarters, celery, onion, carrots, and garlic.*
-
Truss chicken to keep legs and wings tight against the body. (Trussing is optional, but it will keep the legs together and any stuffing from falling out.) Prepare a roasting dish using tinfoil on the bottom and a roasting rack on top.
-
Place the chicken breast side down on the roasting rack.
-
Cook in the oven for 15 minutes.
-
Remove chicken from the oven. Using a glove, rotate the chicken breast side up. Place back in the oven. Cook for 15 more minutes.**
-
Lower oven temperature to 375°F and continue cooking for 30-40 more minutes.***
-
Remove the chicken from the oven once it has reached 165°F internally. Test using a meat thermometer inserted in the thigh. Let it rest on the counter for 30 minutes before carving and serving!
*If you choose to stuff the bird, it will need to cook longer. I prefer to only stuff with a few safe leaves and one quarter orange. That way you get the aromatics and flavors without really changing the cooking time. Adding all aromatics will require approximately an additional 30 minutes in the oven!
**(If the wings are already looking burned, add tin foil covers to them.)
***(Remove the tinfoil wing covers if you used them.)


Leave a Comment